
Prototype, MOQ & Production PlanningFeatured
2026年2月3日
Prototype First, Then Small Batch: A Simple Roadmap for Artists and Brands
When you think about producing a sculpture, figure or art toy, it is tempting to jump straight to “How many pieces can we make, and how much will it cost?”. In reality, the safest and most efficient
When you think about producing a sculpture, figure or art toy, it is tempting to jump straight to “How many pieces can we make, and how much will it cost?”.
In reality, the safest and most efficient way to work with a factory in China is almost always the same:
prototype first, then small batch.
This roadmap is written for artists, IP owners and brand teams who want to turn a design into a physical object without losing control of quality or budget.
Why prototype first is almost always the right choice
A prototype is not “just one sample”.
It is the moment where your design, the factory’s process and real-world materials finally meet.
A good prototype helps you:
- See the true volume and proportions in real space
- Check how colors, gloss level and details feel under light
- Test structure, balance and joints before you commit to a batch
- Fix issues once, instead of fighting the same problem in 100 pieces
Skipping or rushing the prototype usually shows up later as:
- faces that feel slightly “off”
- colors that don’t match what you imagined
- unstable bases, visible seams or assembly issues
- expensive rework, delays and frustration for both sides
Prototype first is not extra cost. It is insurance.
Step 1 – Define your “Version 1” clearly
Before you talk about quantity, get clear on what Version 1 actually is:
– Purpose
Display in a shop? Art edition for collectors? Giveaway? Brand activation?
– Size and material direction
20–30 cm resin figure, 60 cm clear resin sculpture, 150 cm fiberglass mascot, etc.
– What can still change, and what is already fixed
Is the pose final? Can the color scheme move a bit? Do you want the base design locked?
Factories like working with clients who know which parts are flexible.
It makes it easier to suggest technical improvements without touching your core idea.
Step 2 – Prepare files and references for the prototype
For a first prototype, the factory normally needs:
– 2D references
Front/side/back views if you have them, or at least a few consistent angles.
– 3D data (if available)
OBJ / STL / FBX etc. Even if it needs refinement, it gives a strong starting point.
– Notes on finish
Matte vs gloss, flat color vs gradients, metallic or special effects, weathering, transparent parts.
– Any limitations
For example: must be under 30 cm tall, must fit on a shelf, must be child-safe, must be easy to ship.
If you don’t have a 3D file, the prototype stage will include 3D modeling or sculpting.
It is better to say this honestly and allow time and budget for this step, instead of expecting the factory to “just figure it out”.
Step 3 – Ask for a prototype quote and a small-batch scenario
When you contact a manufacturer, make it clear from the beginning:
“I would like to do a prototype first.”
“If the prototype is approved, I’m considering a run of around X pieces.”
Ask them to quote:
– Prototype cost (including modeling, mold, painting, structure, packaging)
– An estimated unit price for small batches at different quantities
(for example 50 / 100 / 300 pieces)
This way you can:
– budget the prototype properly
– already see whether the final unit price makes sense for your audience and sales plan
A professional factory will be transparent that prototype pricing is higher per piece, and they will clearly separate the two stages.
Step 4 – Build the prototype together
During the prototype stage, treat the factory as a technical partner, not just a supplier.
Typical steps:
- File review and technical suggestions
– wall thickness, joints, undercuts, balance, minimum part size
- 3D refinement or sculpting if needed
- Master creation (3D print, clay or a mix)
- Mold making
- Casting or fiberglass lay-up
- Sanding, priming and painting
- Assembly and final finish
Ask for progress updates at key check points:
– first 3D block-out or sculpt
– master before molding
– primed prototype before final paint
– final painted prototype
These steps let you catch proportion or character expression issues in time, instead of discovering them when a full batch is already in boxes.
Step 5 – Use the prototype to validate market and numbers
Once you have the prototype in hand (or at least clear photos and video), it becomes a powerful tool:
– You can photograph it for pre-orders or crowdfunding.
– You can show it to retailers or partners.
– You can collect real feedback on size, price and finish before locking a batch.
This is the moment to ask hard but important questions:
– At what price will collectors or customers actually buy this piece?
– Does the size feel right for that price point?
– Do I need two versions (for example standard and special edition)?
– Is there enough demand to justify 50 / 100 / 300 pieces?
Sometimes the honest answer is: “Not yet.”
In that case, you still have a prototype that can be used for future campaigns, exhibitions or licensing discussions, without committing to inventory too early.
Step 6 – Plan your small-batch run
When you feel ready to move forward, sit down with the factory (even virtually) and plan:
– Final quantity and any variations
(colorways, packaging differences, numbered editions)
– Timeline
lead time for production + buffer for sample approval, shipping and any marketing activities.
– Quality targets
What is acceptable variation for paint, surfaces and manual work?
Which areas are most important (face, logo, transparent parts)?
– Packaging
Will you need individual boxes with branding? Inserts? Certificates?
At this stage, it’s better to simplify where needed rather than overcomplicate.
A clean, well-executed figure or sculpture usually feels more premium than a piece with too many fragile features.
Step 7 – Lock the “production master” and start the run
The approved prototype becomes your “production master”.
Before production begins, make sure everyone agrees on:
– The exact physical sample or master file being used as reference
– Color references (Pantone / paint codes / printed swatches)
– Any tolerances for height, color and finish
Ask the factory to keep clear records:
– photos of the master under neutral light
– notes on paint mixing, clear coat, special effects
– any specific masking or assembly steps that are critical
This is what allows them to repeat the project later, or produce replacements that still look like part of the same edition.
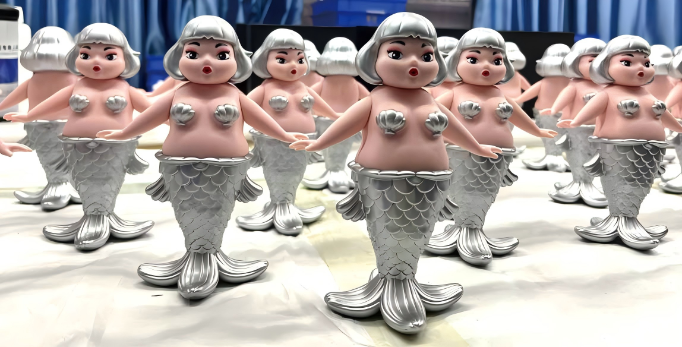
Step 8 – Monitor first-off samples and QC
For a small-batch run, one of the most important moments is the first-off sample from the production molds.
Ask to see:
– at least one unpainted sample (to check casting quality or fiberglass lay-up)
– one fully painted and assembled sample built using the production process
Give feedback on:
– face/expression
– line sharpness and details
– paint edges, gradients, and metallic effects
– packaging and fit
Once you approve this stage, the rest of the batch should follow the same standard.
You can still request periodic photos or random checks, but this first checkpoint carries the most weight.
Step 9 – Ship, receive, and learn
When production is complete, focus on:
– Clear photos of packed pieces and cartons
– Tracking and estimated arrival time
– Damage-handling procedure (photo proof, replacement or repair support)
After you receive the batch, take notes:
– What worked well?
– Where did small issues appear (for example, a fragile detail, a color that photographs differently)?
– What would you simplify or adjust in the next project?
Treat every project as a learning loop.
Prototype first, then small batch, means you are always improving based on real objects, not just digital files.
Gentle closing
For artists and brands, the first production run is often the hardest part of the journey.
But when you break it into two clear stages—prototype first, then a carefully planned small batch—the process becomes lighter and more predictable.
If you are considering a new figure or sculpture and are unsure how to structure prototype and small-batch production, you can send us your references, target size and an idea of your budget.
We are happy to give you honest feedback on what seems realistic now, and what might be better kept for a later edition.#retaildesign